Cinema Camera Rig on Gimbal Stabilizer: What You Actually Need for Pro Video
Cinema camera rig breakdown: a RED-style body with cinema prime lens, wooden handgrips, and 3-axis gimbal stabilizer. What each component does, what you can skip, and how to build a rig that does not collapse under its own weight.
A cinema camera rig is not one product — it is a system. The camera body captures the image, the lens shapes it, the stabilizer smooths the motion, and the accessories let you actually operate the thing for eight hours without your arms giving out. The rig in the photo is a textbook example: a cinema body with a white cinema prime lens, mounted on a 3-axis gimbal with wooden handgrips and a monitor. Every piece has a job.
🏷 Cinema rig gear on Amazon Buy on Amazon → · Check on Etsy →
What components make up a cinema camera rig
The camera body is the core — in this case, a RED-style cinema body with a large sensor and RAW recording. Cinema bodies differ from mirrorless cameras in heat management, recording formats, and modularity. You build around them, not out of them.
The cinema prime lens (the white barrel) is a manual-focus lens with a fast aperture — likely f/1.4 or f/2. Cinema lenses have longer throw on the focus ring, hard stops at infinity and minimum focus, and gear teeth for follow focus systems. The white barrel usually indicates a high-end glass manufacturer like Angenieux, Cooke, or Sigma Cine.
The 3-axis gimbal stabilizer is the mechanical arm that keeps the camera level during movement. It compensates for tilt, pan, and roll — letting you walk, run, or ride a bike while the camera stays smooth. This is not electronic stabilization (EIS) or optical stabilization (OIS); it is a motorized mechanical system that physically counteracts movement.
Why wooden handgrips matter
The wooden handgrips on the gimbal are not decorative. Wood absorbs vibration better than metal or rubber, which means less micro-shake transferred to the camera during handheld operation. Over a full shooting day, wood stays comfortable where rubber gets sweaty and metal gets cold.
The grips also provide a natural ergonomic position — your hands sit at a comfortable angle instead of gripping a cold metal bar. For operators who shoot eight to twelve hours a day, this is not a luxury. It is a necessity that prevents repetitive strain injuries.
The specific grips in the photo appear to be from a company like Tilta or SmallRig, which manufacture cinema accessories. They attach to the gimbal’s rosette mounts and can be repositioned for different shooting styles — low-angle, shoulder-mounted, or tripod-based.
What you can skip (and what you cannot)
The follow focus system — the motorized device that pulls focus during a shot — is essential for narrative work where you rack focus between subjects. For documentary, run-and-gun, or corporate video, you can often skip it and pull focus manually on the lens ring.
The external monitor is non-negotiable. Cinema camera bodies often have small or no built-in screens. The monitor lets you see focus, exposure, and framing accurately — and it doubles as a director’s display when the client is sitting behind you asking “can we get a wider shot?”
The matte box (the rectangular shade in front of the lens) is optional for most work. It blocks lens flare and holds ND filters, but a clip-on ND filter does the same job for a fraction of the cost and weight.
Building your own rig
Start with the camera body and one good lens. Add a cage (the metal frame that wraps the body) for mounting points. Then a monitor. If you shoot handheld, add a top handle and side grip. If you need stabilization, add a gimbal last — it is the most expensive single component and the one you can rent while you decide what you actually need.
The mistake most beginners make is buying everything at once. A rig grows with your needs. Start minimal, learn what you actually use on set, then add components that solve specific problems you encounter. The perfect rig is the one that does not have a single piece you have never used.
Verdict
✅ Pros:
- Modular system — add only what you need
- Gimbal stabilizer eliminates shake without Steadicam weight
- Wooden handgrips reduce vibration and fatigue
- Cinema lenses provide manual focus precision and gear integration
- Professional image quality with RAW recording
❌ Cons:
- Heavy — full rigs weigh 5-8 kg, exhausting for all-day handheld
- Expensive — a complete rig can cost more than a car
- Complex — each component has its own learning curve
- Power-hungry — cinema bodies drain batteries fast, need external power
- Overkill for solo creators — most YouTube and social content does not need this
🏷 Find cinema rig gear Best deals on Amazon →
🇩🇪 This article is also available in Deutsch:
Read in Deutsch →
FAQ
What is a cinema camera rig?
A cinema camera rig is a modular setup built around a camera body — adding a lens, stabilizer, monitor, follow focus, and accessories to create a system capable of professional video production. Each component serves a specific purpose.
Do I need a gimbal stabilizer for a cinema camera?
If you shoot handheld or walk-and-talk footage, yes. A 3-axis gimbal eliminates shake and creates smooth motion without the weight and setup time of a Steadicam. For tripod-only work, skip the gimbal.
What is a follow focus system?
A follow focus is a mechanical or motorized device that lets you pull focus smoothly during a shot. It attaches to the lens focus ring and gives you a larger, more precise control surface than turning the ring by hand.
Are wooden handgrips worth it on a cinema rig?
Wooden handgrips absorb vibration better than metal, stay comfortable during long shoots, and develop a patina over time. They are a personal preference upgrade, not a functional necessity.
How much does a complete cinema camera rig cost?
A basic rig (camera body, lens, monitor, cage) starts around $3,000-$5,000. Adding a gimbal stabilizer, follow focus, and accessories pushes it to $8,000-$15,000. High-end cinema rigs with prime lens sets can exceed $30,000.

Continue reading
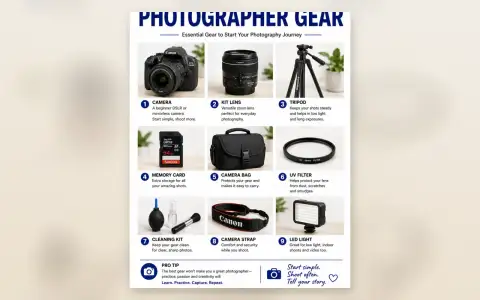
Beginner Photographer Gear: 9 Essential Items to Start Your Photography Journey
Beginner photographer gear guide: Canon EOS 2000D DSLR, 18-55mm kit lens, tripod, SanDisk 64GB memory card, camera bag, UV filter, cleaning kit, camera strap, and LED light. Everything you need to start shooting: nothing you don't.

Studio Lighting Modifiers Comparison: Strip, Softbox, Reflector, China Ball, and Octabox
Studio lighting modifiers compared: strip light with grid, softbox with and without grid, reflector dish, China ball lantern, and octabox with grid. How each modifier changes light quality, spread, and mood — with the same model and the same light source.
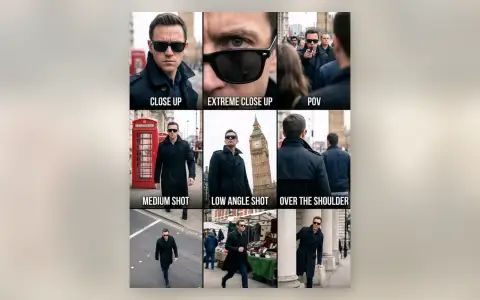
Camera Shot Types Explained: 12 Frames Every Photographer and Videographer Should Know
Camera shot types guide: Close Up, Extreme Close Up, POV, Medium Shot, Low Angle, Over the Shoulder, High Angle, Tracking, Reveal, Wide Shot, Dutch Angle, and Bird's Eye View. When to use each and why it matters.